Blocks
Blocks
Contact Support
STAY IN THE LOOP
Sign up for product updates
ELEMENTS & STRUCTURE
Types of Content Elements
Grid
Navigation: Menu
Blocks: Ready-made Layouts
Forms
Adding a Hamburger Menu
Adding a Search Element
< BACK TO OVERVIEW
Blocks are at the heart of Readz. They allow you to quickly create layouts, mixing up covers, headers, text, images and so on.
These blocks are saved and available account-wide, so all your URLs on Readz can utilize your saved blocks.
1. Using 'Readz Blocks'
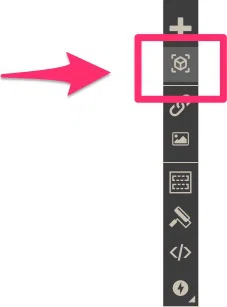
1. To open the Blocks panel, locate the toolbar on the left side of the screen.
2. Click the plus Blocks sign. The Blocks panel displays.
To add a block, simply drag and drop it onto the canvas to its desired position. Once a block has been added, you can change everything about it. You can change the style, add more elements to it, or delete some of the elements in it. There really are no rules here.
Important note:
All the Readz Blocks are 'sections' and defined as 'groups'.
Section: this means that any Readz Block will span the full width of your canvas by default. You can change this property:
- select the block
- right-click
- select 'Convert to Box'
Group: this makes the Block behave as if it were a single element when you move it around. To edit and change elements within the Block, simply 'click-through' on the element, and you will be able to change the styling, edit the content and even delete it. Check this article on
'Grouping Elements'
for more information.
Click every section to open it up and view all the available options.The blocks are grouped into 6 categories.Nothing stops you from using these blocks for any other purpose of course.
- Headers. In this category you will find a selection of covers for your publications and headers for articles.
- Structure. Here you will find some table-of-content layouts, as well as text-with-image blocks.
- Titles & Text. A collection of various text layouts.
- Image & Video.
- Forms. Several pre-made form layouts
- Footers.
2. Creating and adding your own Blocks
Any element, group, section or collection of elements can be added to your library of re-usable blocks.
Creating your own blocks is an add-on to the regular Readz subscription. To enable this feature, you need the 'Design Pro' add-on.
Adding Blocks
Select the element or group of elements you want to convert into a re-usable block.
Add the name and select in which category you want to place your block.
Click 'Done'.
Your block will be added to the 'My Blocks' library and is now ready for use.
If you did not select anything when you clicked the 'Add Block' button, you will be prompted to select the future block in the canvas.
The highlighted area shows the element or group of elements which will be added as a Block.
Click on the highlighted area to add as a Block, or alternatively, click the Cancel button on the top left of the canvas to stop the process.
Deleting Blocks
- hover over the block you want to delete
- a 'Trash' icon will appear, click it
- when asked to confirm, select Yes or Cancel to stop the process
Editing Blocks
- hover over the block
- an 'edit' pencil will appear. Select it to edit the name and/or category.