Google Analytics
Google Analytics
SOCIAL, SEO & ANALYTICS
On-Page SEO
Create 301 Redirects
Connect Google Analytics
Readz Analytics Dashboard
Conversions Step-by-step
Set up Facebook sharing
< BACK TO OVERVIEW
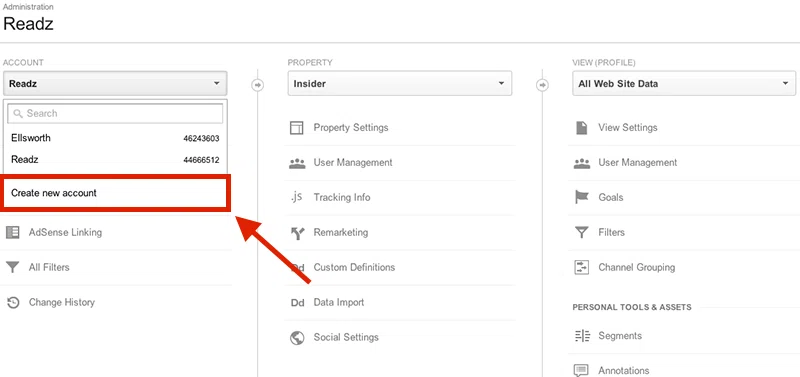
After logging into/making an account with Google Analytics, click on the "Admin" button on the top-right.
You can start by clicking on the drop down menu and adding an account. If you already have one and just want to add a property, you can do that, too. The only difference will be that you have to name that account.
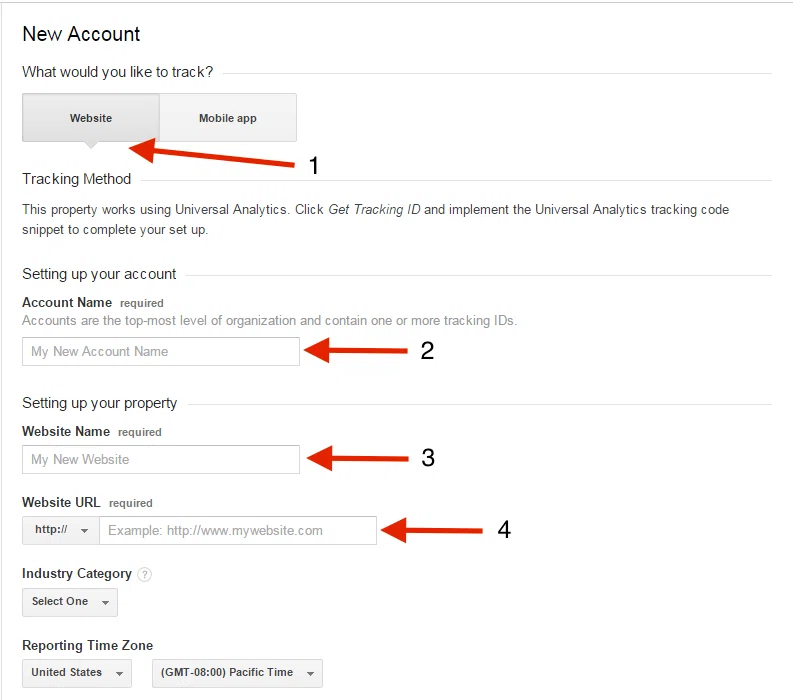
Here you will want to (1) select Website and then (2) input the information for Account Name (unless you are setting up a new property), (3) input Website Name (this is the label you will use for the website), and (4) insert Website URL (the URL that you want to track). You can also add some information in Industry Category and Reporting Time Zone, but it's not required.
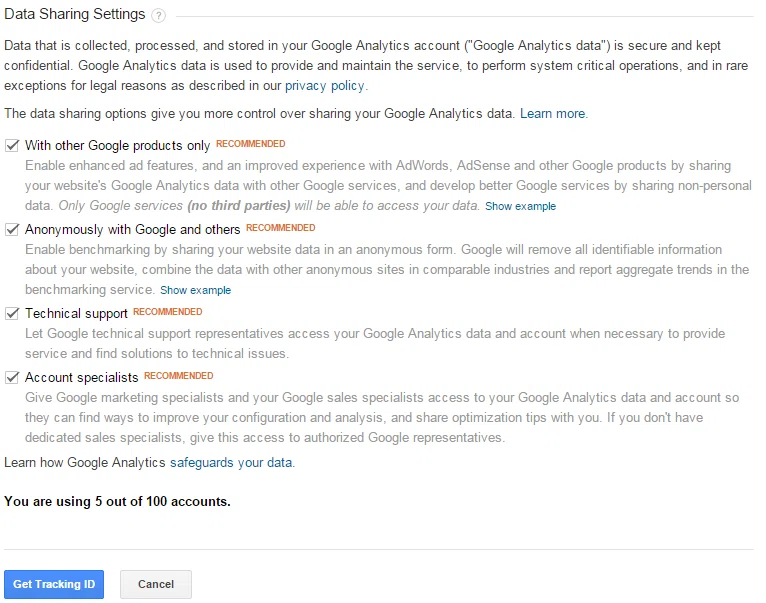
Next, go to Data Sharing Settings. This is where you will decide whether or not you want to share your data with Google.
Once you have made your selections, hit the "Get Tracking ID" button. Click "I Accept" to accept Google's Terms of Service. The only piece of information that you will need is the Tracking ID. Copy it and log into Readz.
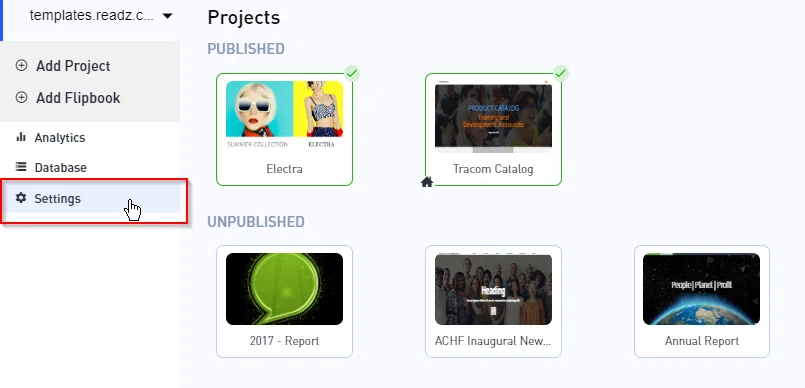
Then open Settings for the domain that you want to track.
Open the Integrations tab and click Manage Google Analytics Integration.
Paste the Tracking ID.
Click CONFIRM and you're all set. You should start seeing traffic on Google Analytics in about 24 hrs.
Contact Support
STAY IN THE LOOP
Sign up for product updates


